7/18/11

From The Garden

Here is a picture of my first large picking from the gardens. I worked outside last Friday pulling weeds,  watering, and picking. I see shortcake, salad, zuchini bread, and beans for dinner in my near future.  
I've been picking strawberries and lettuce for a month and peas for a couple weeks.
I have created wonderful salads- Feta with mandarin oranges; mixed vegetable with homemade poppyseed dressing; egg salad on a bed of lettuce. My family just loves the peas- we eat thm raw all the time. My girls will pick them while they are outside playing. They run and get a handful out of the fridge for a snack. 

The zuchini and yellow squash is finally ready to pick. Time to make fried breaded zuchini, squash salad, and yummy zuchini bread.

7/7/11

SOFTBALL FRENZY

We have been so busy around here with my oldest's softball schedule. She is playing for a team that is located nearly an hour from our home. She also over an hour from our home. Its been crazy just making all practices throughout each week. She has played in tournaments at least 1 to 3 hours from our home.  Although its been a lot of sacrifice and time, we enjoy watching her play and doing what she enjoys and does well. This is her last year playing 16U level ball. She will have to play 18U next year. She has mentioned that she may not play at all. We are trying to hold on to the days we have left. She has played baseball/ softball since she was 6 years old. Its been our life, her life.

Here is my oldest daughter (left) Haleigh with one of her best buddies from High School (right) Alexis. Her friend also plays for this organization but, plays for the 18U team. They were hoping to play for the same team but, it did not work out that way. Good thing... they both play 1st base.

I have always tried to make something crafty for most teams she has played for. Whether its snack bags, cards, scrapbooks, frames, etc... I enjoy crafting and like to share unique creations with the girls that also are  memories.  I decided to make Softball tags for water bottles for the girls.

I came across this stamp set many years ago (It is not SU!). I jump on anything that has to do with softball. Its very hard to find softball themed items for paper crafting/ scrapbooking. Most the time I use baseball themed things with adaptions. This was the first stamp set I ever saw that had GIRLS playing ball.
I LOVE IT!

I wrapped each water bottle with misc pink paper and taped with regular scotch tape. I found Propel powder individual packets at our local Warehouse Club and have used them all season. They pack so easy in the basket and are easily added to water bottles.  
I attached an individual packet with glue dots onto paper and bottle. I stamped each image with Archival black ink. Colored with PrismaColor pencils and blended with Gamsol. Inked edges of each tag with Melon Mambo SU ink. Used 2 different sized star punches, scalloped oval, 1 1/4 inch circle all from SU! Used my die cut for Florette (mentioned in previous post). Attached all items with 3D glue dots, mini glue dots, or hot glue gun. I wrapped black ribbon around lid (loose) and hot glued to back of tag. Allowed ribbon ends to hang past bottom of tag.

I made a couple specific for our team's pitchers (right). The batter image (left) is for the rest of our team. I hope the girls like them.

7/5/11

Patriotic Rockets

Hope you all had a great Holiday. The 4th of July is one of my favorite Holidays. I love patriotic decorations, seeing flags throughout landscapes, family picnics. Most of all I love what it stands for FREEDOM! This country is such an amazing place to live. Everyone should be very thankful each and every day.

I made these adorable rockets from toilet paper and paper towel rolls. I stumbled upon these adorable rockets while reading one of my favorite blogs http://tatertotsandjello.blogspot.com/2011/06/red-hots-and-blue-fourth-of-july-rocket.html. After seeing  the first sample I did further search and found other ways to make these rockets. Martha Stewart http://www.marthastewart.com/photogallery/patriotic-crafts has a great tutorial and how to make them into party poppers/ favors. Here's how I  made them.

Supplies:
empty paper towel rolls or toilet paper rolls
strips of designer papers
(11x12" for towel, 4x8" for TP roll)
scissors
circle cutter
firm hold adhesive
glue gun
ribbon 15 inches in 3 patterns/ colors

Wrap each tube with decorative paper of your choice. Apply tape strip to both ends and in 2 places within center. I reinforced tape at end with hot glue.

Cut 3.25" circles out of various designer papers. This will be used for the coned top of the rocket.

Cut a straight line 1/2 diameter of the 3.25" circle as shown in picture above.

Bring ends together overlapping until the paper forms cone shape. Use hot glue to hold together.

make 3-4 loops into each strip of ribbon. This will be used for flames at bottom of the rocket.

Adhere all loops together with hot glue. Hold together until set and attach 3 various looped ribbon pieces to bottom of rocket.

I used to make my accordian flowerette by hand but I came across this fabulous one that runs through my die cutting machine. I use this for all my small flowerettes. The diecut makes it so much easier.
If you make by hand- cut 1.5 x 12" strip. Score at each 1/4" increments, accordion fold, glue ends together, apply hot glue to 1 " circle and press center down to form flowerette. Hold until glue sets.

Wrap ribbon around bottom of rocket for further decoration. Add circle sticker, stamped image, or stamped verse to center of flowerette.

Here is a photo of various styles I made. I think they turned out super cute.

5/15/11

EASY PEPPERONI ROLLS

Here is an easy recipe I make on weekends. The pepperoni rollas are very satisfying. Serve them alone, room temperature or warm, with marinara sauce, and or with a side salad. They are sure to please.


Ingredients:
1/2 lb sandwich pepperoni
36 frozen dinner rolls, thawed (follow directions)
8-12 oz of shredded mozzerella cheese
seasoned salt
black pepper
italian seasonings

1. Let rolls thaw as package directs. Spray large cookie sheet and spray clear wrap with non stick cooking spray.

                                                    2. Cut sandwich pepperoni into quarters.


3. Flatten each roll and spread until about 4 inches in diameter.
4. Place pepperoni in center like this. Fill it as much as you like. I like to use 3/4 to 1 slice in each roll.

5. Bring up your sides to cover pepperoni.
                                             6. Once pepperoni is covered then pinch dough to seal.

                                                                                       
   7. Mix olive oil, italian seasoning, salt, and pepper in narrow dish. Brush onto top of rolls prior to baking.

                                                                           
                                 8. Bake at 350 degrees F. until golden brown or 15-20 minutes.

Viola! Add a side salad and some pizza or marinara sauce to make a delicious and easy weeknd meal.

4/15/11

Mission Organization- Part 3

I have been cleaning, organizing, somewhat simplifying (my life is never simplified completely) around the house. As I mentioned in a previous post, I tackled my kitchen over my Spring Break Holiday. It took me 2 solid days of cleaning, scrubbing, organizing, donating. I am fortunate to have a walk in pantry in my fairly large country kitchen.
 Here are a couple pictures of my walk in pantry BEFORE I cleaned and organized.
I had similar things in my drawers, cabinets, and pantry. Although it was accessible, it was not organized. I have collected recipes and cookbooks for years. I had them in 3 different places. Now, I have the ones I kept (yes, I did get rid of some) all in one spot. I have organized like things, labeled containers, and used up all the space. I am happy with how things have turned out.
Here are pictures of the pantry AFTER I organized.
I invested in some coated wire shelving to add to my wood shelfs in the cupboards and pantry to add more space for dishes and canned goods. I bought lazy Susan (not pictured) and placed in corners of shelves  where they overlapped. These work great for oils, sauces, bottled items, ketchup, dressings, etc...

 I bought some hanging coated wire shelf drawers on the top of one shelf for popcorn packets and Jello packets. Vertical storage for the plates, platters, and large dishes I use for buffets and parties.

4/12/11

KITCHEN DRAWER ORGANIZATION


As I mentioned in a previous post, I have been doing some organizing throughout the house. Last week I decided to tackle the kitchen. I cleaned drawers, cupboards, pantry, closets,  a hutch, above cupboards and inside of the oven. yeah!!!!
Here is a photo showing the "junk drawer" (next to the kitchen phone). I found this drawer organizer at a thrift store ($1.50). You can find plastic drawer organizers like this at TARGET for under $8.00. It is perfect for holding papers, tape rolls, pens/ pencils, scissors, etc...  There is nothing worse than trying to take a message and not being able to find paper and/ or something to write with. With this organizer everything is visible, at your fingertips and accessible.

We replaced a set of knives a while back but did not purchase a knife block to store them in. Personally, I do not like storing knives in a block- they get very dusty and sometimes get food or debris splashed on them from mixing, boiling, preparing at the counter. I found this fabulous knife storage container that adjusts to fit various sized drawers at TARGET. How perfect? Now I don't have to worry about anyone cutting themselves while reaching in the drawer.  Especially now that my kids do dishes.
Here is a photo of the drawer containing measuring cups, spoons, straws, fresh clips, coffee scoops, etc... I found this drawer divider at IKEA for under $3.00.  LOVE IT! Use this type of divider in many drawers throughout my house especially within my craft room (scroll down to bottom of my blog to see more photos).

4/6/11

Spring is in The Air! Blossoming Everywhere

Here are a some details about a couple exciting things going on at STAMPIN' UP!

SPRING  IS BLOSSOMING Promotion dates: April 1-30, 2011


                           http://www.stampinup.com/ECWeb/CategoryPage.aspx?categoryID=791

Promotion details: Spring is Blossoming includes two brand-new products from the upcoming 2011-2012 Idea Book & Catalog. You can get these brand-new products in one of two ways:

•Spend $20* on any Stampin' Up! products and become eligible to purchase both the Four Frames Set and Paisley Petals Designer Series Paper.

•Host a $350* workshop and get the Four Frames Set and Paisley Petals Designer Series Paper for FREE!

Paisley Petals Designer Series Paper

#122367 - $9.95

Four Frames Stamp Set
Wood: #123440 - $20.95

Clear: #123442 - $15.95

Hostess Gift

#125735 - Four Frames Wood Stamp Set & Paisley Petals DSP - FREE

#125736 - Four Frames Clear Stamp Set & Paisley Petals DSP - FREE

•Orders may be placed either online, in person or at a workshop.


•Customers must spend $20 to be eligible to purchase the Four Frames stamp set and/or the Paisley Prints Designer Series Paper.


•Both items can be purchased once the $20 minimum is met; there is a limit of five per product once the $20 minimum is met.


•Customers will receive the Four Frames and Paisley Petals Designer Series Paper FREE if they host a $350 workshop (net sales before tax and shipping).


$5, $10, $15 GRAB BAGS AVAILABLE only while supplies last.

                               http://www.stampinup.com/ECWeb/ItemList.aspx?categoryID=793

$5 GRAB BAG= $20  of retired merchandise excluding stamp sets.
$10 GRAB BAG= $40 of retired merchandise excluding stamp sets.
$15 GRAB BAG= $65 of retired merchandise excluding stamp sets.

MISSION ORGANIZATION- FINISHING THE BAKERS RACK

I was on Spring break this past week and started my Spring Cleaning.  I have been on a mission... MISSION ORGANIZATION. Here is one of the first projects I did to organize an often cluttered spot in my kitchen.
 
I have had this bakers rack from a famous Ohio based basket company for many years. I bought the rack and baskets separately and always said I would eventually get the wood shelves for it one day. Well, many years have passed by and I have never bought those lovely wood shelves.
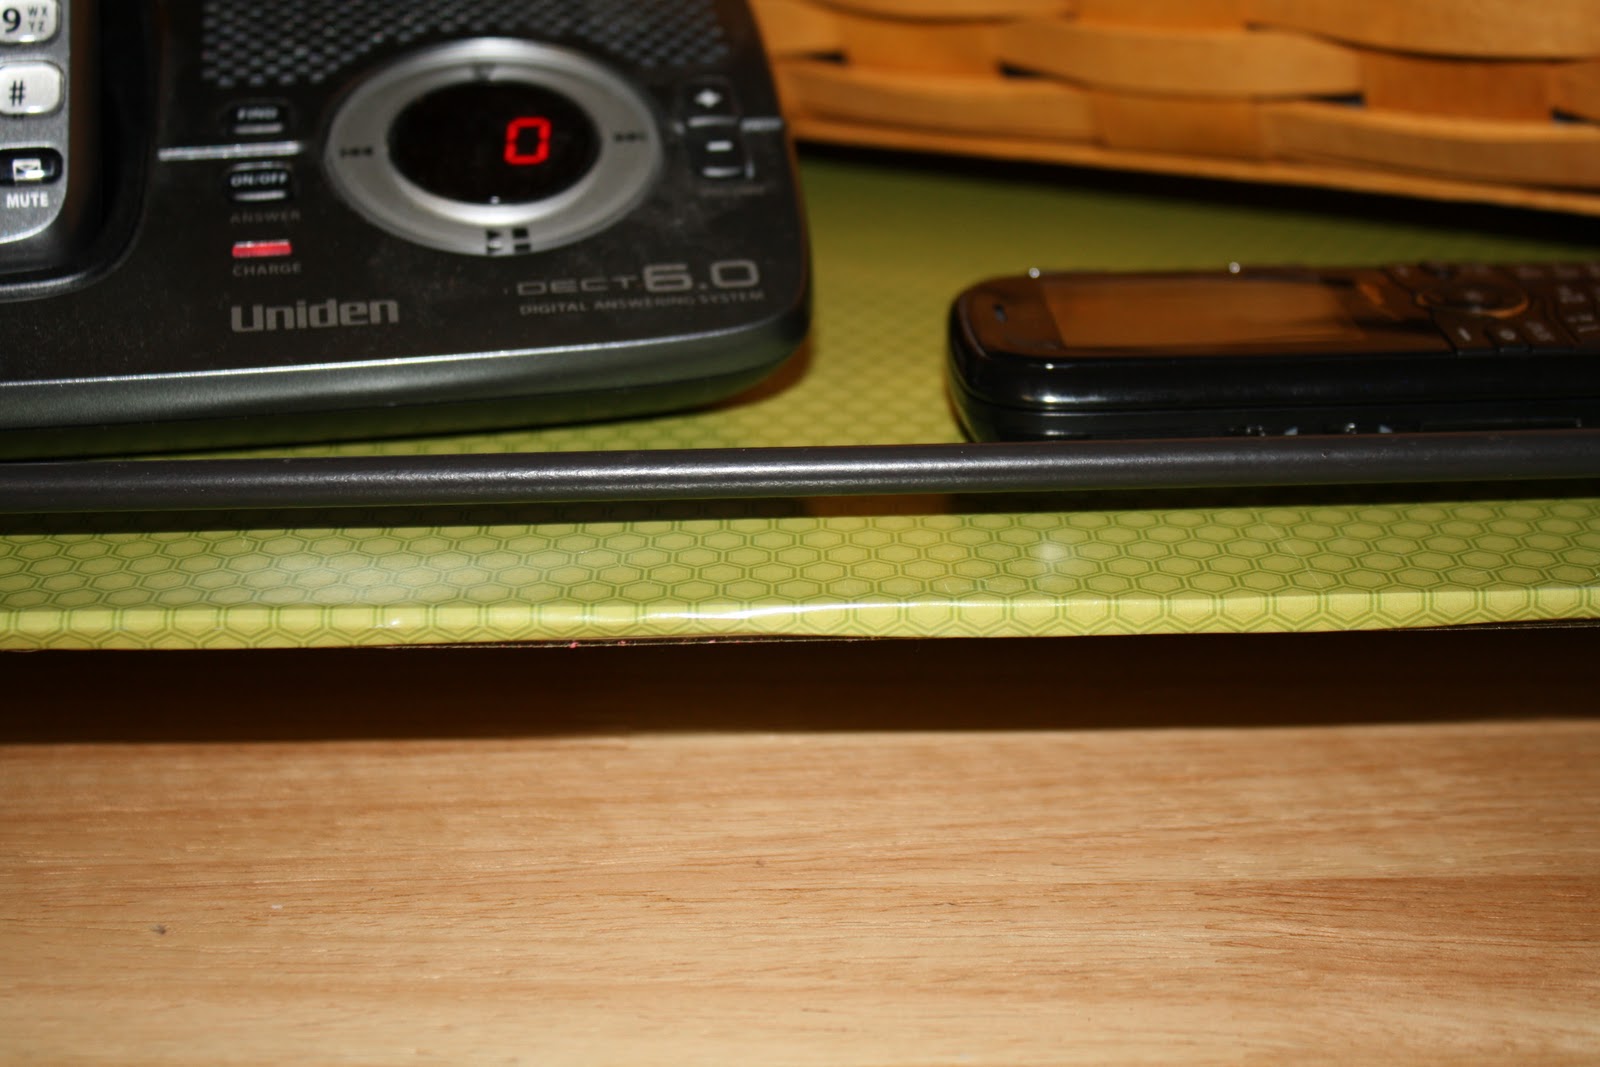
For years I stored a  larger basket on the bottom which covered the bottom part of the rack.  Recently we had to replace our telephones and, unfortunately, our new phones did not have a wall mount ( we should have read the details on the box better).  I needed a shelf to put on the rack to hold the kitchen phone and use as a charging station for cell phones. (now what to do with the ugly phone jack and cord behind the rack?)

I decided to use some cool paper I bought in a tablet, at a local craft store measuring 12 x 24 inches. This paper is not flat/ matte it has a sheen to it (not vinyl).  Its weight is a great for covering items, decoupaging items, and to run through large formatting die cut machines. I especially like it because it can be dusted or wiped clean. The tablet contained 36 various bold designer papers from the HANDMADE line. I chose this subtle green pattern to wrap some corrugated cardboard trimmed to size.
I cut the cardboard 1 inch smaller lengthwise and 2 inches larger width wise for both shelves. I cut the green paper 1.5 inches larger on all sides. I trimmed the corners on bias (diagonal). Wrapped the corners using super sticky adhesive. I finished the edges on under side with wide scotch tape. I am sorry I did not take photos while making it. If you have further questions please let me know. 
 This shelf is located to the right of a long counter, under phone jack, near drawer containing paper and pencils. I use the top basket for holding vitamins and daily medications and the basket on the bottom holds mail/ bills. I am pleased with the way it turned out.
You cannot tell it is cardboard shhhhhhh... its our little secret. ;)

4/4/11

Easy Skillet Beef Strogonoff


Hello, sorry it has been a while since I have posted. I had a computer crash, and after purchasing a new computer and trying to get things set up, I contracted a virus that wiped everything out. I was without a computer off and on for over 3 weeks. Still trying to get things up and running. I am missing my old HP photo processing software. Tying to adjust to the Canon photo stuff. Oh well, it will take time.


I'm back with another semi homemade/ perfect weeknight/ workday recipe.
Ingredients:
1 1/2 lb  lean ground beef (90% or more)
1/2 medium sweet onion, chopped
1 pint mushrooms, sliced *optional
1 clove garlic, minced
2 Tbs flour
1 tsp salt
1 tsp fresh ground pepper
1 can cream of mushroom soup (reduced fat works)
8 oz sour cream (reduced fat works)
*cooked egg noodles approximately 1 cup per person*


Brown ground beef, onions until just cooked (not pink and onion softened). Drain excess grease. Add  mushrooms and cook until tender.


Add garlic, flour, salt, pepper, soup and sour cream and stir until mixed thoroughly. Do not allow to boil. Serve on top of egg noodles. Garnish with tops of green onions, chives, fresh parsley or other favorite herbs.


 Its not the prettiest dish but it is a good one to fall back on. Both my girls and my husband enjoy it. Its been raining here all day and no sign of letting up for a while- its a good dish to have on a cold damp day like today. I cannot wait until warm weather gets here... we like to grill out nearly everyday. Stay tuned.

2/23/11

SCRAPBOOKING SUGGESTIONS

I will soon be starting another stamp club and the majority of the ladies wanted to do scrapbooks (some are semi seasoned or seasoned scrapbookers and some are newbies). I thought I would so some comparisons and clarifications regarding style and size of the scrapbooks sold by SU! pg 180 in catalog
First, I want to say that I have been scrapbooking for over 15 years. (Not counting some of the books I put together in HS). I consider myself a SEMI- PRO when it comes to this kind of thing. I am very familiar with terminology, machines, design companies, magazines, etc... Stampin Up! has a great selection of scrapbooks and papers to choose from.

We sell books that are similar to those you will find in craft stores, online, and various other retail stores. Our prices are comparable too. We sell 12 x 12 inch Vinyl printed  post bound albums in green leaf pattern, red polkadot pattern, and yellow houdstooth pattern for $19.95. We sell a Natural Linen postbound and ring bound album in 12 x 12; 8.5 x 11; and 6x6 inch size.They range in price from $16.95-$29.95 each. We sell a Red Linen postbound album in 12 x 12 inches at $29.95 and ring bound in 12 x 12 inches at  $26.95 and 6 x 6 inches at $16.95 inches. We sell a Navy Linen album in postbound 12 x 12 inches at $29.95 and Ring bound albums in 12 x 12 inches at $26.95 and 6x 6 inches at $16.95.  Look at the link above to see scrapbooks.
Keep in mind that we sell SIMPLY SCRAPPIN' KITS (pg 178-179 in main catlog) that coordinate with our books and make your scrapbooking a little easier. Our papers and embellishments idealy coordinate with our albums. That takes some of the thought process and worries away.

Natural Linen Album coordinates with: Christmas Cheer Simply Scrappin' kit, Newsprint Designer Paper, Elegant Soiree Designer paper, woodland Walk Designer paper, Nursery Suite Specialty paper, Sweet and Sour Specialty paper, Lap of Luxery Designer paper, or Blueberry Crisp Designer paper. (All papers can be seen on pages 172-175 of main idea book and catalog).

Real Red Linen Album coordinates with: Play Date Designer paper, Build A Bear Pawsitively Prints 2 paper, Celebrations Designer paper, Love letter Designer paper. (all papers can be seen on pages 172-175 of main idea book and catalog).

Navy Linen Album coordinates with: Blueberry Crisp Designer paper, Celebrations Designer paper, Good Times Simply Scrappin' kit, Christmas Cheer Simply Scrappin' kit (all papers can be seen on pages 172-175 of main idea and catalog).

So Saffron Houndstooth Album coordinates with: Love Birds Simply Scrappin' kit, Build a Bear Pawsitively Prints2 Designer paper, Play Date Designer paper, Nursery Suite Specialty Paper. (all papers can be seen on pages 172-175 of main idea book and catalog).

Real Red Polka Dot Album coordinates with: Play Date Designer paper, Newsprint designer paper, Celebrations Designer paper, Love Letter Designer paper. (all papers can be seen on pages 172-175 of main idea book and catalog).


Old Olive Leaves Album coordinates with: One great year Simply Scrappin' kit, Play Date Designer paper, Build a Bear Pawsitively Patterns 2 designer paper, Jolly Holiday designer paper, Greenhouse Gala Designer paper, Woodland Walk designer paper, Celebrations, Wicked Fun Specialty Paper (all papers can be seen on pages 172-175 of main idea book and catalog).


Also we sell QUICK ACCENTS (pg 176 in main catalog) to assist in adding the finishing touches onto your pages or other projects.
They coordinate with the albums, papers, as well as some stamp sets.

2/17/11

HIGHJACKED!

Sorry for the long abscense. My computer crashed late last week and I have highjacked my kids' computer to write this post. I ordered a new computer, and  it arrived yesterday. I am waiting for a CAT 5 line to be run to my computer. Its been so long since I have had a desk top- I forgot about a few things when I ordered it. I ran out last night to get keyboard and mouse (what was I thinking?). I'm not sure when I will be up and running again.
Also, my husband is having surgery in the morning. I'm sure my posts will be sporadic. Hope you all have a great long weekend. Hope you all can get out and enjoy some spring-like weather.

2/7/11

What is for dinner tonight? Chicken and Dumplings

I'm back with an easy and yummy recipe. As promised, I will be posting at least one recipe each month to my blog site. All recipes will be easy and perfect for 'busy moms' like me to cook after a full day at work. No need to cook all day to get delicious results-I promise. As I have mentioned before, I consider myself a 'SEMI HOMEMADE' cook. I am just as busy as many moms out there and I know what  weeknights are like.
Chicken and Dumplings is one of my husband's favorite meals. He has always asked, "you cook so many different things, don't you know how to make chicken and dumplings?" To tell you the truth, I had always heard of this dish but, I had never ate it. My mother never prepared this for us as children. I guess I was deprived. I don't know. I have a good friend that makes FANTASTIC chicken and dumplings- she cooks all day. I don't usually have time or patience for that... I like delicious results at a faster pace.
This dish is perfect for a cold evening (much like we have been experiencing in NE Ohio for the last 2 months). It reheats well and is even more delicious the next day.

CHICKEN AND DUMPLINGS
6 chicken thighs
2 (10.7 oz) cans of condensed cream of celery soup
1 stalk of celery, diced
1 carrot, diced (optional)
1/8 of a large sweet onion, diced
salt and pepper to taste
2 cups of Jiffy biscuit mix
2/3 cup of milk
In medium soup pot over high heat, combine the chicken thighs with enough water to cover. Boil for 15-20 minutes. Drain some of the water from the pot,but  reserve 3 cups in the pot. Remove chicken from the pot and allow to cool (place on cookie sheet an din fridge for a few minutes). Add onion, celery, and carrot  into the reserved water within the pot and cook until tender. While veggies are cooking- pull chicken from bones into chunky pieces and return to the pot.
Meanwhile, prepare dough for dumplings baking mix with the milk.
Reduce heat to simmer, add the cans of soup, stir until mixed well. Season with salt and pepper. Drop spoonfuls of dough into pot, cover and cook for additional 20 minutes.

Make dumplings the size you prefer. My husband enjoys large full  dumplings. This part is personal choice.