
Showing posts with label Halloween projects 2010. Show all posts
Showing posts with label Halloween projects 2010. Show all posts
11/1/10


10/31/10

I'm going to share a new way for coloring your artistic creations-PAN PASTELS. I have recently discovered them and cannot tell you how fun they are to use. They are a type of chalk (Pastel) that you apply with a sponge tipped applicator. The applicators have multiple sized/ shaped tips. They dry very fast and do not have to be sprayed to keep them from smearing or wiping away. Let get started with a quick tutorial, shall we?

Here is a look at the Pastels. They are very large and can be stacked or placed into this plastic tray. (They kinda remind me of loose powder makeup containers.) You can see (kinda) the applicators in the black cup behind the pastels.

I wanted to make a moon as the center of this image so I punched a 2" circle out of scrap paper and placed it in the center of my cut cardstock as a mask. I started with darker blue and purple near the edge of the punched circle mask to start creating the night sky. I used the applicator and rubbed pastel colors in a circular pattern and blended as I went.


When you achieve the look you want peel the circle up and place the reverse circle (the piece of scrap paper you punched your 2" circle from) over top to mask out the sky that you just chalked.
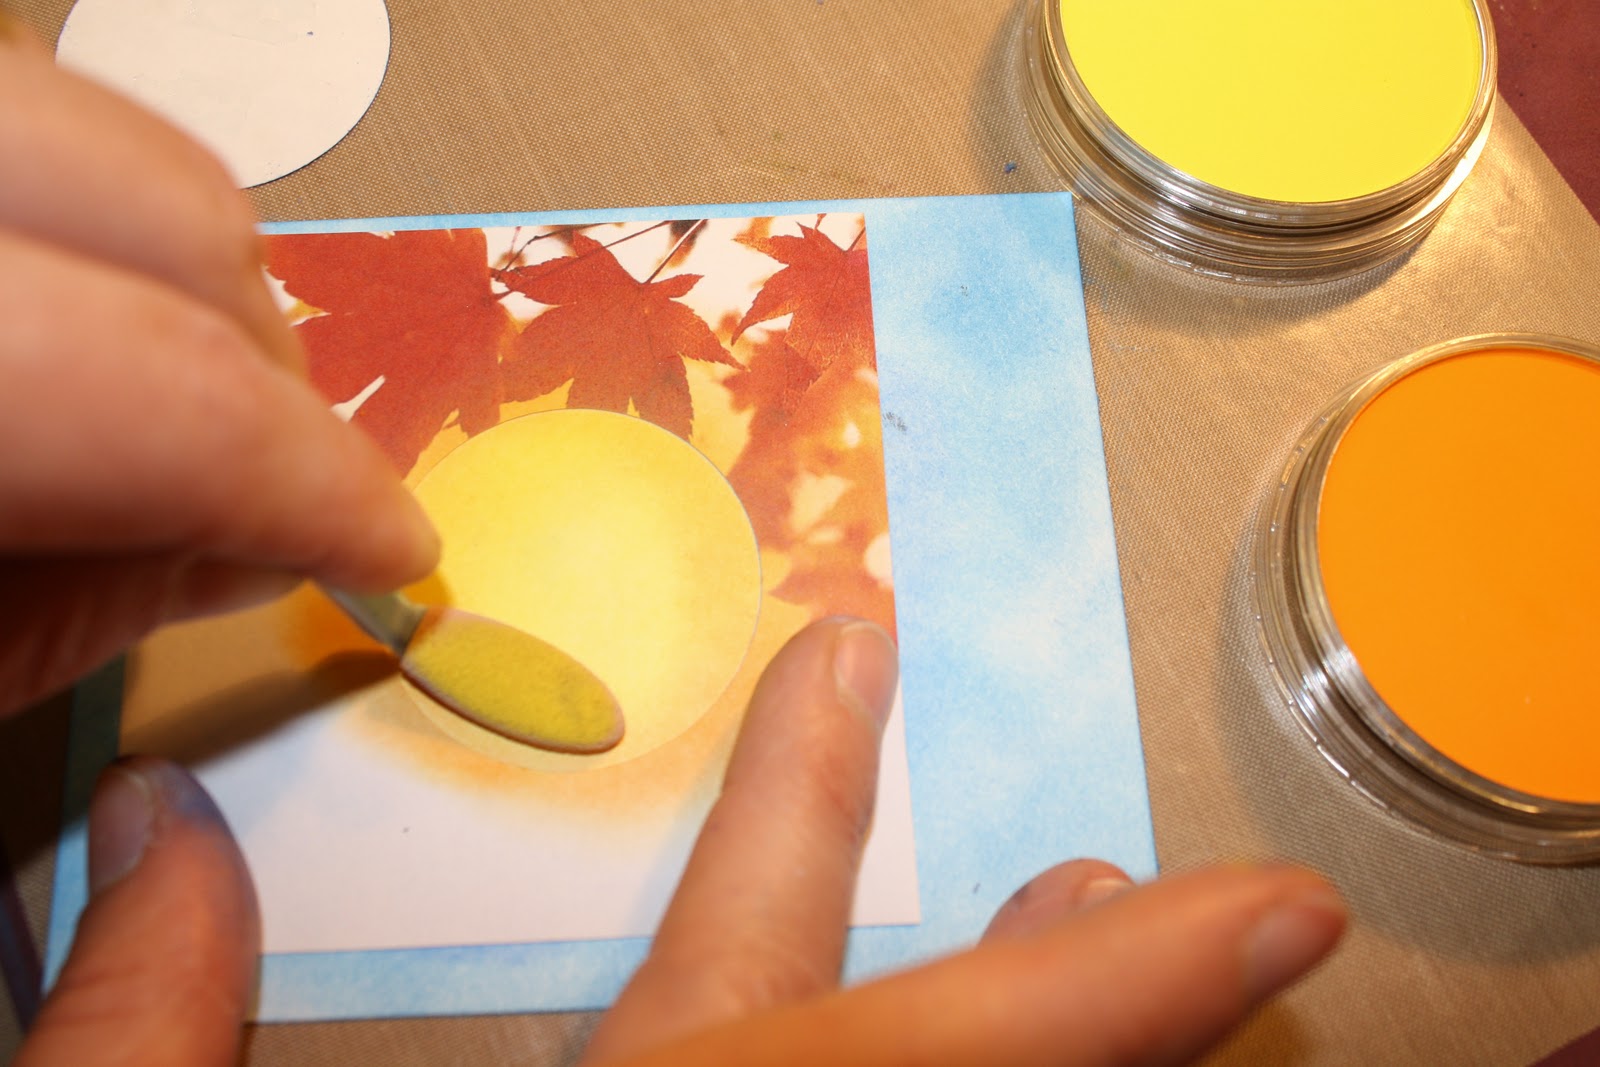

I used both a bright yellow and an orange yellow to chalk the details of the moon. Going darker (from outer edge) to lighter (inner edge).

Here is what it looks like when you are at this point.

Now you are ready to stamp. This technique works best with solid image stamps like this Stampin' Up! MIDNIGHT RAVEN #116529 single stamp. Use a bold dark color like Stampin' Up!'s BASIC BLACK CLASSIC INK #101179.

Here's what it looks like at this point.

I added some bats from Stampin Up!'s set WICKED COOL #120600 around the moon on both sides.I stamped some random tree branches. I matted the image on navy and cajun cardstock. I added some retired Stampin' Up! buttons at the bottom.

Viola!
10/13/10
ALL WRAPPED UP


I used a movie theater- size MIKE & IKE to create this spooky candy wrapper/ gift. The box is approximately 7.25 x 3 inches. I wrapped the box of candy with Nite Owl paper. I cut the small pieces for the sides of the box seperately. Used decorative edged scissors to cut the label and then added a skull label found on one of the sheets from this pack of "spooky...ooky" paper.


I added color and depth with the STAMPIN' PASTELS #120962 (all new colors in this kit). Ran some Cajun Craze cs through the machine to emboss with the new embossing texture folder SPPIDER WEB #120889. Attached chalked image to box front with Dimensionals #104430 so that ribbon would lay flat under the image.


10/11/10
STAMP CLUB PROJECT- PAPER PUMPKINS

We made these paper pumpkins last Saturday at my last Stamp Club meeting. (A similar but smaller pumpkin is shown on page 27 in the Idea Book and Catalog). I used misc. fall themed papers, large paper connectors (brads), craft wire, tulle, and paper leaf cut outs. Absolutely "NO STAMPING" on these. The really are simple to make, I made all these (pictured above) with the leftovers not used at the workshop (I cut way too many). Thicker paper and cardstock work better than one sided paper. You can stuff these with crumbled tissue paper to help keep its shape. Everyone individualized theirs with color choices, leaf choises, and tags.


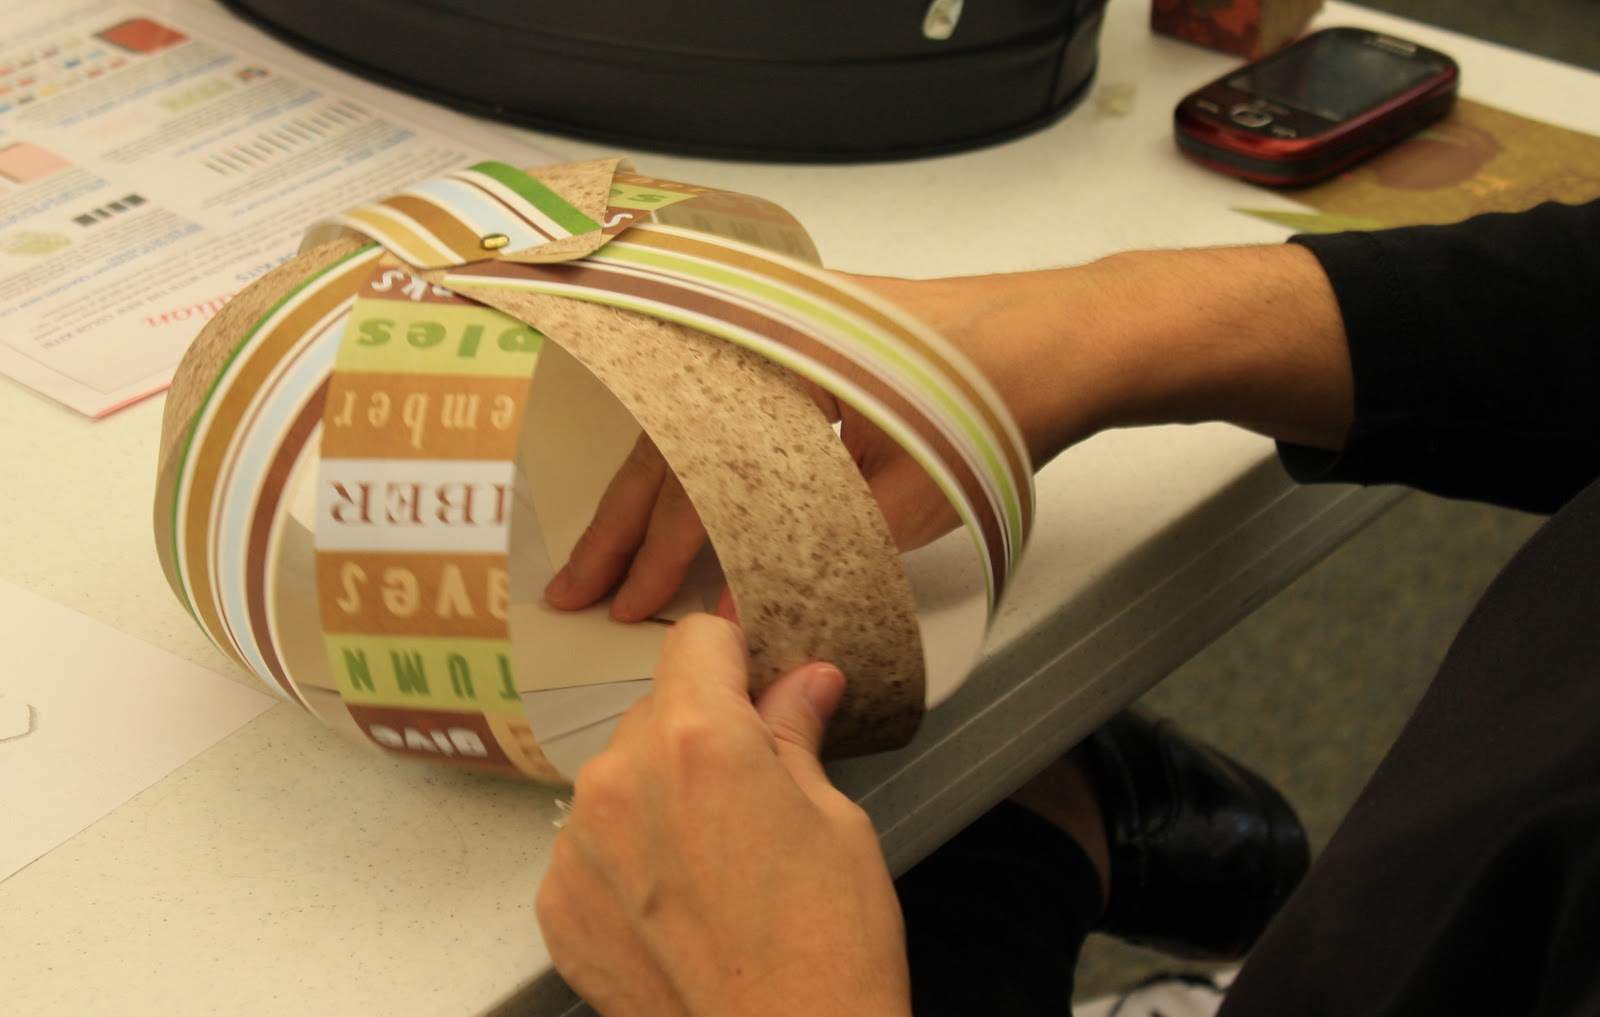
Use 9-15 2x12 inch strips of cardstock and/ or designer papers. Lay the strips in design order (A-B-C pattern works great). Punch both ends 1/4 inch from ends and centered with CROPODILE #108362. Place brad in one end to hold pieces together. Flip strips over (white side or non dominant side face up). Take first strip on top and start turning into round shape, add brad. Move in sequence around, taking the next strip then the next until all up, and attached with brad. Fasten brad. take 6 inch piece of craft wire and wrap one time around brad head on top. Punch some leaves or tags and thread onto wire. Curl wire ends using stylus or dowel (curling the wire will hold your tags and leaves on but also add dimension and detail). Spread the strips out evenly and form to look like pumpkin. See pictures.

Here are some close- up pictures of a couple pumpkins. You can see the leaf, wire, and tag details. The one on the left is using one (busy) pattern paper with a contemporary style- clean/ simple. The pumpkin on the right is more country/ shabby style. Scroll back to first picture and you will see a couple pumpkins done with non traditional fall colors. They are done with blue, green, brown, white. I also made a Halloween style- candy corn, white tulle and black ribbon and lace.


10/9/10
DRY EMBOSS PUMPKIN TAG


It is hard to see in this photo but, it makes the pumpkin look 3D (round). It pops up off the paper. You can place somthing behind it (Stampin dimensions, crumbled paper pieces) depending on how 3D you want it to look.


Above are 2 samples I did using the GREETING CARD KIDS stamp set (#120633) and retired Halloween verse. Colored pencil and Gamsol blending solution. Thanks for stopping by. Hope you have a great weekend.
10/1/10
FROM THE CRYPT

Stamped some more Halloween things today. Dug out the set FROM THE CRYPT (#115460) Used the layout on page 25 from the Idea Book & Catalog as inspiration for my tag and card layouts. This picture is not very clear, scroll down to see some more up close.

Here is a close up of the tag. I used the MODERN LABEL PUNCH (XL #119849) and 1 3/8" CIRCLE PUNCH (# 119860) to add detail behind the main image. I also used the 3/4" CIRCLE PUNCH (#119873) that I stamped BOO! onto. I hand cut the bat image and folded the wings to add dimension, like it is flying. COPPER MINI BRADS (retired) and COPPER EYELETS (#105319) to further embellish. I distressed the edges using the distress tool from the CUTTER KIT (#106958).


I used the Awesome TASTEFUL TRIM Bigz Die (#120893) to add further paper detail to the side of the card and to the botom of the tag. This die cut is awesome (like I said before). Ric Rac, baker's twine, and fabric are all the rage in the paper crafting world right now. I'm so glad SU! is up on the latest and greatest. They really make it fun to craft.

Have I told you how Fantastic the new COLOR COACH (#121620) is? I cannot live without this sucker. It makes everything much easier. It takes the thinking out of planning and making projects of all kinds. I am using the Sweet Pea combination CAJUN CRAZE (#119684), ALWAYS ARTICHOKE (#105119), and PERFECT PLUM (#101889). I would have never used these exact colors on a Halloween project prior to owning this. It opens your eyes to a whole new colorful world. Well, enough rambling, I'm off to bed soon, I have a busy day planned tomorrow. I am attending the Adventures In Stamping convention tomorrow :) I need all the sleep I can get, it may get crazy...
9/29/10
DARK & DREARY ENSEMBLE


I recycled a spice jar and decorated it using TANGERINE cs (#111349), TEXTURED BLACK cs (119922), GOING GRAY cs (retired), RAVEN LACE trim (#120988), DECORATIVE LABEL PUNCH (#120907), misc. colored baker's twine, and plastic spider. I used hot glu eto adhere the label, and spider. Distressed the edges of the candle image with TANGERINE INK (#111834) using SPONGE DAUBERS (#102892). I filled the jar with black and white gumdrops. Now, which "lucky", or should I say "unlucky", person should I give this to?

I love making tags! They are one of my favorite things to make. They work for just about everything. They can be super easy to very elaborate but, always so fun to make. "When in doubt, add a tag". This goes for card fronts, scrapbook pages, candles,labels, gifts, etc... I used GOING GRAY cs ( retired), BASIC GRAY cs (#121044), BASIC BLACK cs (#121045), TANGERINE (#111349), RAVEN LACE trim (#120988), DARK & DREARY stamp set (# 121151), SPIDER WEB TEXTURE FOLDER (#120889), decorative edge scissors (retired), misc. ribbon and baker's twine, misc. spider web edge punch, and plastic spider. Thanks for stopping by. Hope you enjoyed the ensemble and my quick/ easy ideas. Make sur eto stop by again.
9/27/10
DARK & DREARY HALLOWEEN


Speaking of 1/2 " LACE TRIM, have you bought this yet? If you haven't, shame on you! It is great! It ties easily, lays flat, and is so charming added to a variety of surfaces. Just look at it against this tangerine cardstock before I added it to the card fronts. I assembled everything in an assembly line and thought these looked so great all by themselves. "Kinda Spooky"


Viola! Didn't it work out perfect? How else could you add the color in a perfect circle? You can use this technique on many circular images and accents. I have never stamped on a gray and I love the look of it with the distressed edges. Stay tuned for some more fun ideas using this line of products, make sure you check back again this week. Thanks for stopping by.
8/30/10
I love Halloween and almost everything that goes along with Halloween. It is my absolute favorite time of year. Caramel apples, beautifully colored leaves, crisp air, autumn decorations, hot cider, evening outdoor fires, sweatshirts, and spooky festivities.What could be more fun than a Halloween Party? Its the perfect time for everyone to pretend they are someone/ something else. My friends and family call me a Halloween "FREAK". The funny thing is that my brother, best friend, and next door neighbor are all 'Halloween Lovers' too. I am a sucker for anything orange and black with bats, cats, witches, and ghosts.

These projects are for my upcoming club meeting I have in less than 2 weeks. I chose to use WICKED FUN #117400 ds paper and the coordinating WICKED COOL # 120600 stamp set. Both are new to the SU! line and can be found on pages 22 &23 of the main idea book and catalog. Those of you that don't have a current catalog can view any of the current catalogs here: http://www.stampinup.com/us/enu/default.asp.
My Halloween "Spooky" creations were totally insired by two Stampin Up! demonstrators that I follow on a daily basis through their business blogs ( Mary at http://www.stampinpretty.com/ and Angie at http://www.chicnscratch.typepad.com/chic_n_scratch/page/2/ ). Both women are so creative and do such wonderful things with SU! products.

The Spooky Mini Bag is so easy and adorable. It will hold Reese's Cups, Hershey Nuggets, Peppermint Patties, Fruit Snack Packs, or anything that is around that size. It is hand cut and folded (no die cut machine needed) The flap is held closed with velcro- how perfect! You will get 3 from one sheet of 12 x 12 inch paper. The finished mini bag measures 3x3 inches. The bats are from SU!s new large bat punch #119279.
Directions for this project can be found here: http://www.chicnscratchlive.com/
(just scroll down through all the videos until you get to the spooky bag)
Those ladies that are attending my club will get written and pictorial directions.

Directions for an easel card can be found here: http://www.splitcoaststampers.com/resources/tutorials/easelcard/
This was the first easel I have made- super easy! Will be making them again. I think they will be perfect for Christmas photo cards. I used the color spritzer tool to splatter ink around the image. I distressed the edges of the image and cardstock with basic balck ink and a sponge dauber. Viola!
Materials used:
Wicked Fun DS Paper: #117400 $11.95 pg 172
Wicked Cool Stamps #120600 $14.95 pg 23
Bitty Bat Punch #119279 $15.95 pg 201
Extra Large Scallop Oval Punch #119856 pg 201
1 1/4 inch circle Punch #119861 $16.95 pg 203
Large oval Punch #119855 $16.95 pg 203
Color Spritzer Tool #107066 $12.95 pg 195
Old Olive Grosgrain 1/4 inch Ribbon #111368 $4.95 pg 191
(Rich Razzleberry/ Old Olive Markers)
If you have any questions, please feel free to email me. I would love to hear from you. thanks for stopping by. Be sure to stop by and see some more Halloween creations. I will be making many more creations up until that Haunting Day.
Subscribe to:
Posts (Atom)