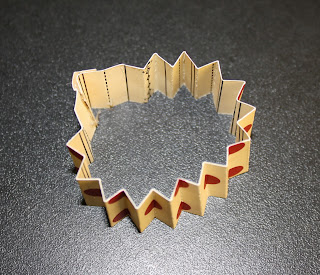
Here is the project I instructed this past weekend at a Stamp Club. The ATC (Artist Trading Card) incorporates a couple techniques that I like to use on Vintage-style projects. I have given a small tutorial for the rosette below.
I used the set GREETING CARD KIDS item #120633 from the Idea Book and Catalog. This and the WINTER POST set are my favorite Holiday sets from the current catalog. Here is a link to see the Greeting Card Kids set: http://www.stampinup.com/ECWeb/ProductDetails.aspx?productID=120633 Now time for the tutorial.
Cut a strip of 2-sided designer paper 1"x 8.5". You can make these larger (if you make the depth larger then you have to make the length larger). I think the 1" x 8.5" is great size for card fronts, scrapbook pages, and ATC embellishments.
You will need a scoring frame. There are a couple different makers for these frames. The one I used is a new release and does 1/8" increments- It is awesome! I feel it is better than the other score frame that has been out for a few years simply because it does closer increments. Email me if you'd like to know more about this specific frame, sorry it is not an SU! product. I wouldn't doubt that they come out with something similar, they do well keeping up with the latest and greatest papercraftiong trends and competitors.
*For this rosette I scored at 1/4" increments the entire length of the strip.
Once the strip is scored entirely, you fold it accordian style. It should fold easily.
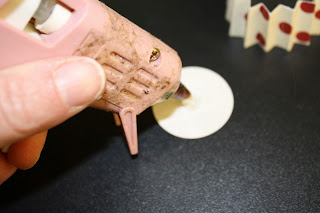
Glue ends together. I like using a hot glue gun, it holds the best.
Punch a 1 1/2 or 1 3/8" circle for base. Place glue in center of circle, place paper rosette on top, press the center down and hold until glue sets. You do not see the circle it just provides stability for the rosette.
Viola! Now you can attach another rosette, button, punched shape, or a stamped image on top. You will
love making these, they are kinda addictive. hahaha
Here is a glimpse of another Vintage Valentine that I made for the gals in the stamp club. I love distressing and making things look old.
Materials:
SU! FULL HEART punch #119883
Colored pencils for coloring
Distressed edges with SOFT SUEDE #115657
I used the LOVE LETTER #117162 DSP
Retired pink paper used
* The Love Letter DSP works fantastic for vintage style cards. SU! also sell a coordinating 12 x 12" scrapbook #119809 (red polka dots on cream-just like the paper strip above).
Thanks for stopping by, hope this tutorial is helpful and that you can create fantastic Vintage inspired projects.


1 comment:
Great workshop! I had a wonderful time ~ thanks Denise!!!
Post a Comment